Hono と Cloudflare D1 を使えば、マイグレーション 1 本とルート 5 本、約 70 行の TypeScript で CRUD の REST API が作れます 。テーブルは wrangler d1 migrations で管理し、wrangler dev --local と curl で動きを確かめ、@cloudflare/ で Workers のランタイムの中でテストします。この記事では Todo API を実際に作り、2026 年 10 月時点の Hono 4.13・Wrangler 4.147.0 で動かした出力と、同じものを Claude Code に作らせるときのプロンプト例を載せます。
Hono は、Cloudflare Workers などのエッジ環境で動く軽量な Web フレームワークです。D1 は Cloudflare のサーバーレスな SQL データベースで、中身は SQLite です。Worker から D1 へはバインディング (env.DB のように Cloudflare のリソースを呼ぶ設定)でつなぎます。
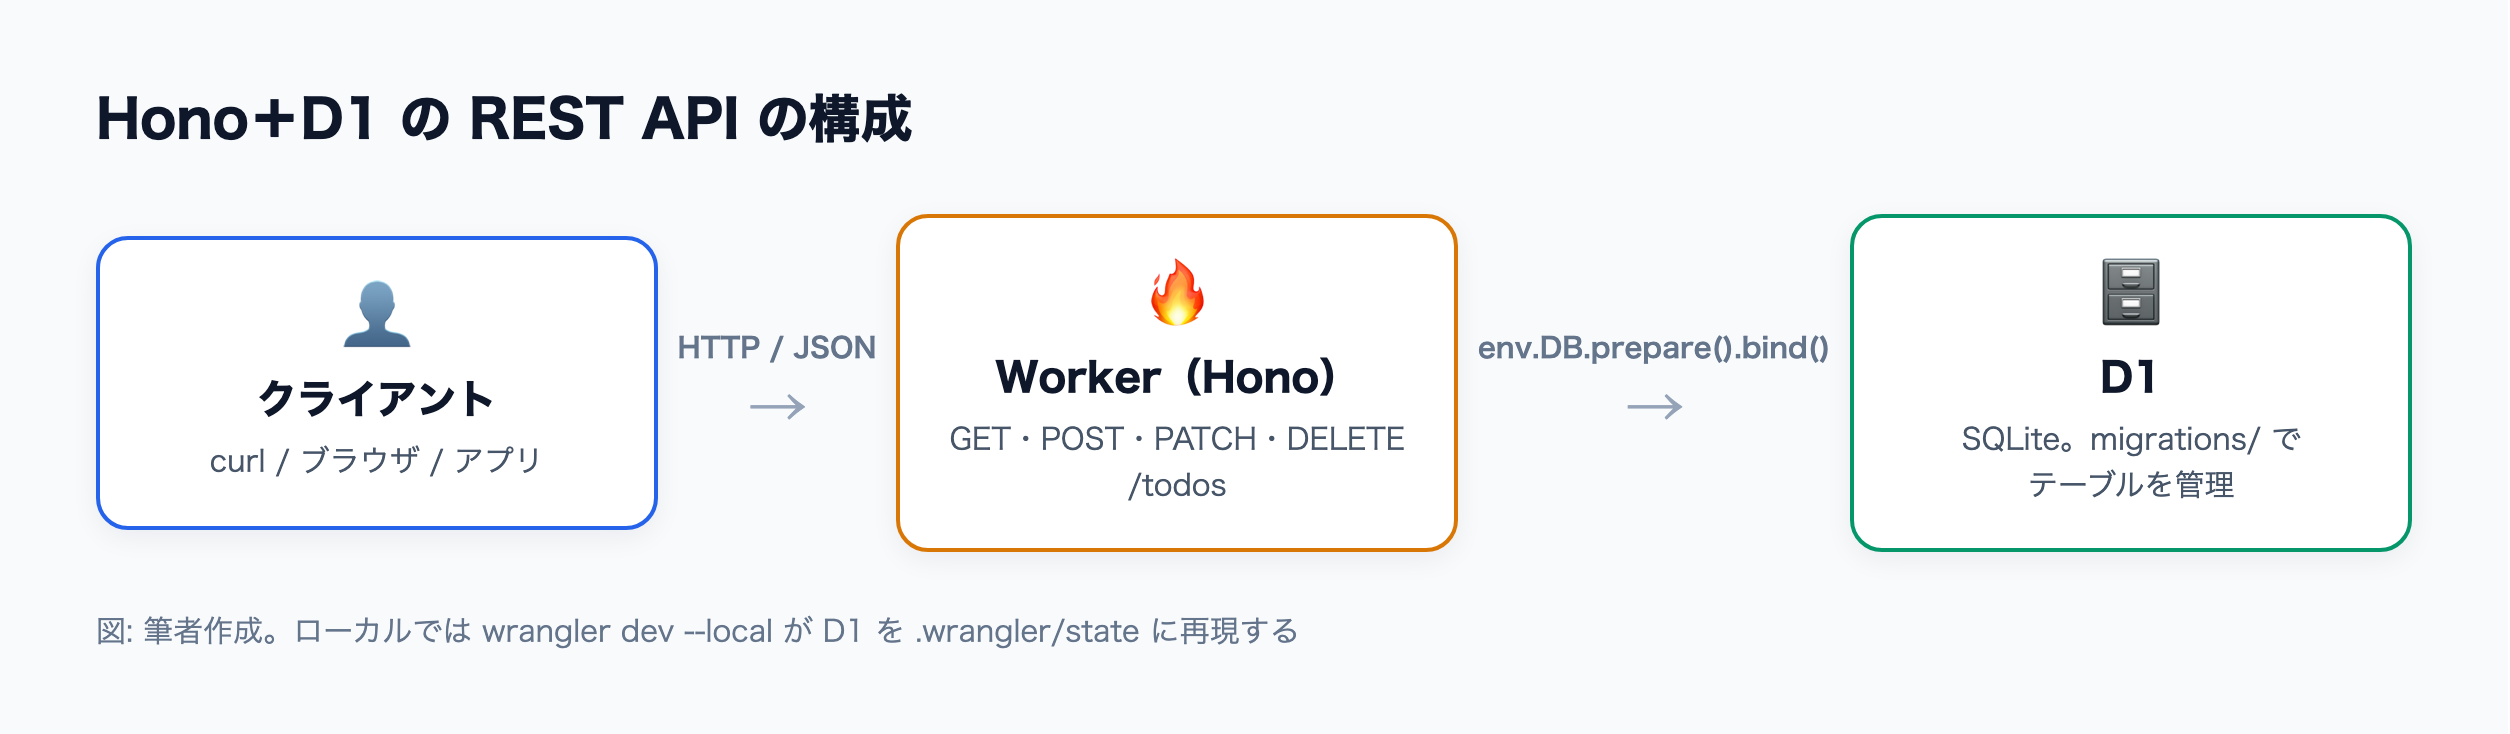
クライアントが HTTP で Hono の Worker を呼び、Worker が env.DB 経由で D1 に SQL を投げる構成 図: 筆者作成
今回作る API は次の 5 本です。
メソッド パス 動作 成功時 GET /一覧 200 GET /1 件取得 200(無ければ 404) POST /作成(title 必須) 201(title が無ければ 400) PATCH /title・done を更新200(無ければ 404) DELETE /削除 204(無ければ 404)
Express に慣れた人なら、Hono のルートの書き方はほぼそのまま読めます。違いは、Node.js の req/res ではなく Web 標準の Request/Response を使う点と、D1 などのバインディングを c.env から受け取る点です。
Google トレンド(日本・過去 90 日、2026-10-05 取得)では、相対値で「Hono」の直近 4 週の平均は 2.7 で、その前の 8 週の平均 0.8 から上向きです1
Google トレンドの相対値(日本・過去 90 日):前 8 週平均と直近 4 週平均 データを表で見る Google トレンドの相対値(日本・過去 90 日):前 8 週平均と直近 4 週平均 語 前8週平均 直近4週平均 Hono 0.8 2.7 Cloudflare Workers 0.8 2 Next.js 2.3 1.3
出典: Google トレンド(日本・過去 90 日、2026-10-05 取得)の相対値。複数回の取得(Hono・Next.js は 1 回、Cloudflare Workers は別の回)で、どの回も基準語 GitHub Copilot の値が 26.7 の同じ尺度 Hono は依存が少なく、コードが短く読みやすいので、Claude Code のような AI コーディングエージェントにも書かせやすい題材です。D1 も、ローカルでは Wrangler が SQLite を再現するため、アカウントが無くても開発とテストを一通り回せます。
先に完成形のプロンプトを示します。手順 1〜5 の内容を Claude Code に任せるなら、次のように「作るもの」「使う道具」「確かめ方」「やらないこと」を 1 回で伝えます。
Cloudflare Workers + Hono + D1 で Todo の REST API を作ってください。

作るもの:
- GET/POST /todos、GET/PATCH/DELETE /todos/:id
- todos テーブル(id, title, done, created_at)。title が空なら 400、無い id は 404

進め方:
- テーブルは wrangler d1 migrations create で作る。D1 のバインディング名は DB
- wrangler.jsonc を変えたら wrangler types を実行する
- テストは @cloudflare/vitest-plugin。マイグレーションは readD1Migrations と
  applyD1Migrations でテスト前に流す
- API 名や上限値は cloudflare スキルか Cloudflare のドキュメントで確かめてから書く

確かめ方:
- npx tsc --noEmit、npx vitest run が通ること
- wrangler dev --local を起動して curl で 5 本すべてを叩き、出力を見せる

やらないこと:
- --remote の付いたコマンド、wrangler deploy
Claude Code に Cloudflare の公式スキルや Docs MCP を入れる方法、CLAUDE.md に書いておくべきことは Claude Code で Cloudflare Workers を作る全手順 にまとめています。以下は、このプロンプトで Claude Code がたどる手順を、人の手で 1 つずつ確かめたものです。
C3(create-cloudflare)の最小テンプレートで作り、Hono を足します。Hono 公式の npm create hono@latest(cloudflare-workers テンプレート)でも始められますが2
npm create cloudflare@latest -- todo-api --type =hello-world --lang=ts --no-git --no-deploy --agents
cd todo-api
npm install hono
実行した時点のバージョンは次のとおりでした。
todo-api@0.0.0
├─┬ @cloudflare/vitest-plugin@1.3.6
├── hono@4.13.13
├── vitest@4.1.11
└── wrangler@4.147.0
wrangler.jsonc に d1_databases を足します。binding がコードから使う名前(env.DB)、database_name が D1 のデータベース名です。
{
"$schema" : "node_modules/wrangler/config-schema.json" ,
"name" : "todo-api" ,
"main" : "src/index.ts" ,
"compatibility_date" : "2026-10-01" ,
"observability" : { "enabled" : true } ,
"upload_source_maps" : true ,
"d1_databases" : [
{
"binding" : "DB" ,
"database_name" : "todo-db"
}
]
}
公式の入門では、先に npx wrangler d1 create <名前> で本番のデータベースを作り、返ってきた database_id を書く流れです3 自動プロビジョニング (open beta)があり、database_id を書かなくても wrangler dev と wrangler deploy が動きます。デプロイ時にデータベースが無ければ作られ、ID は設定ファイルに書き戻されます4 database_id なしで、ローカルの開発とテストが動くことを確かめました。
設定を変えたら型を作り直します。worker-configuration.d.ts の Env に DB: D1Database が入ります。
npx wrangler types
D1 のマイグレーションは、migrations/ に連番の SQL ファイルを置いて順に流す仕組みです5
npx wrangler d1 migrations create todo-db create_todos
migrations/ ができるので、テーブル定義を書きます。
CREATE TABLE todos (
id INTEGER PRIMARY KEY AUTOINCREMENT,
title TEXT NOT NULL ,
done INTEGER NOT NULL DEFAULT 0 ,
created_at TEXT NOT NULL DEFAULT (datetime('now' ))
);
ローカルの D1 に適用します。--local は .wrangler/ にある手元の SQLite に流す指定です。
$ npx wrangler d1 migrations apply todo-db --local
Migrations to be applied:
┌───────────────────────┐
│ name                  │
├───────────────────────┤
│ 0001_create_todos.sql │
└───────────────────────┘
🌀 Executing on local database todo-db (DB) from .wrangler/state/v3/d1:
🚣 2 commands executed successfully.
┌───────────────────────┬────────┐
│ name                  │ status │
├───────────────────────┼────────┤
│ 0001_create_todos.sql │ ✅     │
└───────────────────────┴────────┘
適用済みのマイグレーションは d1_migrations テーブルに記録され、次からは未適用のものだけが流れます5
src/ を次の内容にします。new Hono<{ Bindings: Env }>() と書くと、c.env.DB に D1 の型が付きます2 Env は wrangler types が生成した型です。
import { Hono } from "hono" ;
type Todo = { id : number ; title : string ; done : number ; created_at : string };
const app = new Hono <{ Bindings : Env }>();
app.get ("/todos" , async (c) => {
const { results } = await c.env .DB .prepare (
"SELECT * FROM todos ORDER BY id" ,
).all <Todo >();
return c.json (results);
});
app.get ("/todos/:id" , async (c) => {
const todo = await c.env .DB .prepare ("SELECT * FROM todos WHERE id = ?" )
.bind (c.req .param ("id" ))
.first <Todo >();
return todo ? c.json (todo) : c.json ({ error : "not found" }, 404 );
});
app.post ("/todos" , async (c) => {
const body = await c.req .json <{ title ?: unknown }>().catch (() => null );
const title = typeof body?.title === "string" ? body.title .trim () : "" ;
if (!title) return c.json ({ error : "title is required" }, 400 );
const todo = await c.env .DB .prepare (
"INSERT INTO todos (title) VALUES (?) RETURNING *" ,
)
.bind (title)
.first <Todo >();
return c.json (todo, 201 );
});
app.patch ("/todos/:id" , async (c) => {
const body = await c.req
.json <{ title ?: string ; done ?: boolean }>()
.catch (() => null );
if (!body) return c.json ({ error : "invalid json" }, 400 );
const todo = await c.env .DB .prepare (
`UPDATE todos
SET title = COALESCE(?, title),
done = COALESCE(?, done)
WHERE id = ?
RETURNING *` ,
)
.bind (
body.title ?? null ,
body.done === undefined ? null : Number (body.done ),
c.req .param ("id" ),
)
.first <Todo >();
return todo ? c.json (todo) : c.json ({ error : "not found" }, 404 );
});
app.delete ("/todos/:id" , async (c) => {
const { meta } = await c.env .DB .prepare ("DELETE FROM todos WHERE id = ?" )
.bind (c.req .param ("id" ))
.run ();
return meta.changes > 0
? c.body (null , 204 )
: c.json ({ error : "not found" }, 404 );
});
export default app;
書き方のポイントは 4 つです。
値は必ず bind() で渡す : SQL に文字列を連結しない。? のプレースホルダーに bind() で渡せば SQL インジェクションを防げる6 RETURNING * で 1 往復にするRETURNING を使うと、INSERT・UPDATE した行をそのまま受け取れる。first() は最初の 1 行(無ければ null)を返す6 削除の有無は meta.changes で見る : run() の結果の meta.changes に、変更された行数が入る6 done は 0/1 で持つNumber(true) で 1 にして保存する
export default app だけで Worker になるのは、Hono のアプリが Workers の fetch ハンドラーの形をしているためです。
npx wrangler dev --local で起動します。--local はリモートのバインディングを使わず、すべて手元で動かす指定です。起動時に、D1 がローカルで動いていることが表示されます。
Your Worker has access to the following bindings:
Binding               Resource         Mode
env.DB (todo-db)      D1 Database      local
[wrangler:info] Ready on http://localhost:8791
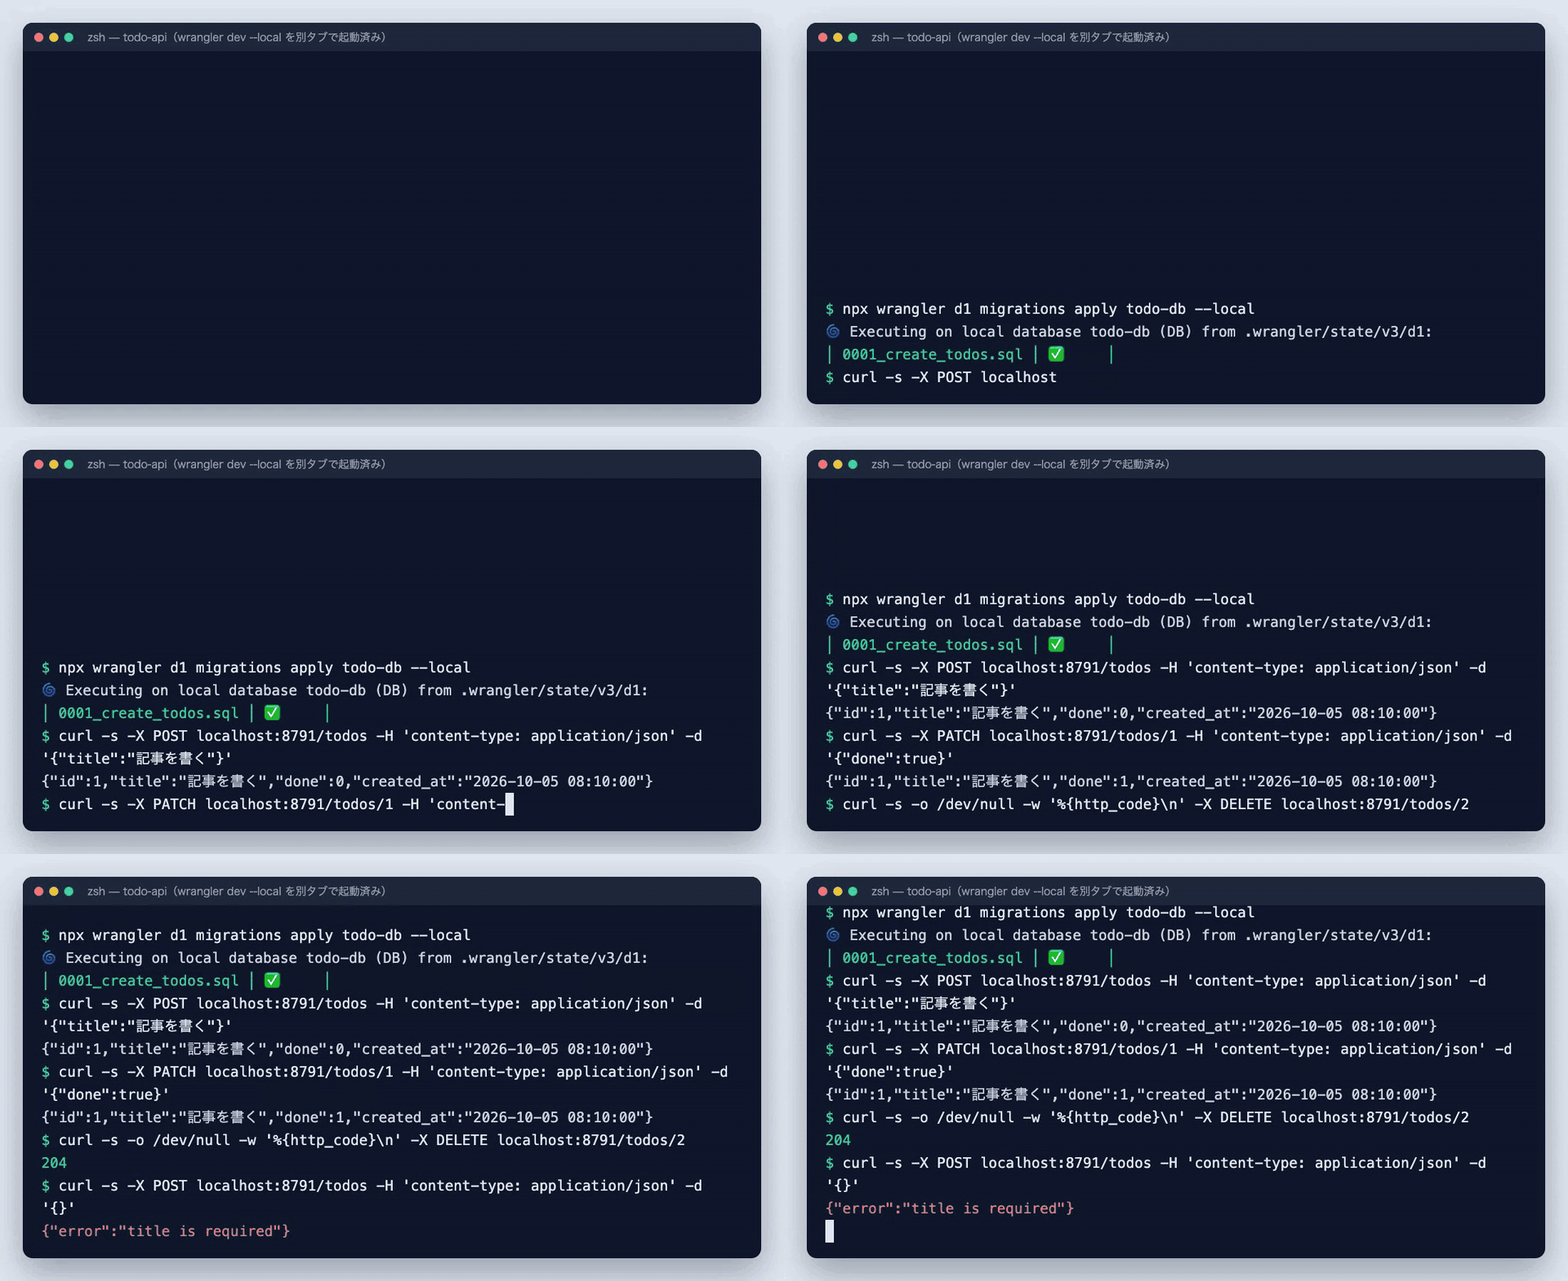
別のターミナルから curl で 5 本を叩いた結果です(ポートは他のアプリと重ならないよう 8791 にしました)。
d1 migrations apply --local のあと、curl で作成・更新・削除・バリデーションエラーを確かめたターミナル 筆者が 2026-10-05 に実行した出力。マイグレーションの出力は一部を省略
$ curl -s -X POST localhost:8791/todos -H 'content-type: application/json' -d '{"title":"記事を書く"}'
{"id":1,"title":"記事を書く","done":0,"created_at":"2026-10-05 08:10:00"}
$ curl -s -X POST localhost:8791/todos -H 'content-type: application/json' -d '{"title":"テストを足す"}'
{"id":2,"title":"テストを足す","done":0,"created_at":"2026-10-05 08:10:00"}
$ curl -s localhost:8791/todos
[{"id":1,"title":"記事を書く","done":0,"created_at":"2026-10-05 08:10:00"},{"id":2,"title":"テストを足す","done":0,"created_at":"2026-10-05 08:10:00"}]
$ curl -s -X PATCH localhost:8791/todos/1 -H 'content-type: application/json' -d '{"done":true}'
{"id":1,"title":"記事を書く","done":1,"created_at":"2026-10-05 08:10:00"}
$ curl -s -o /dev/null -w '%{http_code}\n' -X DELETE localhost:8791/todos/2
204
$ curl -s localhost:8791/todos/2
{"error":"not found"}
$ curl -s -X POST localhost:8791/todos -H 'content-type: application/json' -d '{}'
{"error":"title is required"}
Wrangler のログにも、各リクエストのステータスと処理時間が出ます。
[wrangler:info] POST /todos 201 Created (11ms)
[wrangler:info] PATCH /todos/1 200 OK (20ms)
[wrangler:info] DELETE /todos/2 204 No Content (8ms)
[wrangler:info] GET /todos/2 404 Not Found (11ms)
[wrangler:info] POST /todos 400 Bad Request (5ms)
DB の中身は wrangler d1 execute で直接見られます。
$ npx wrangler d1 execute todo-db --local --command "SELECT id, title, done FROM todos"
🚣 1 command executed successfully.
[
  {
    "results": [
      { "id": 1, "title": "記事を書く", "done": 1 }
    ],
    "success": true,
    ...
  }
]
テストには、Workers のランタイム(workerd)の中で Vitest を動かす @cloudflare/ を使います。2026 年 10 月時点の C3 の雛形に入っているのはこのパッケージです。以前の @cloudflare/ を置き換えたもので、Cloudflare は「パッケージの API と Vitest の設定は変わらない」と説明しています7
テスト用の D1 は空なので、テストの前にマイグレーションを流します。Cloudflare の公式サンプルと同じく、設定ファイルで readD1Migrations() を使って SQL を読み、テスト専用のバインディング TEST_MIGRATIONS として渡します8
import path from "node:path" ;
import { cloudflareTest, readD1Migrations } from "@cloudflare/vitest-plugin" ;
import { defineConfig } from "vitest/config" ;
export default defineConfig (async () => {
const migrations = await readD1Migrations (
path.join (import .meta .dirname , "migrations" ),
);
return {
plugins : [
cloudflareTest ({
wrangler : { configPath : "./wrangler.jsonc" },
miniflare : { bindings : { TEST_MIGRATIONS : migrations } },
}),
],
test : { setupFiles : ["./test/apply-migrations.ts" ] },
};
});
import { applyD1Migrations } from "cloudflare:test" ;
import { env } from "cloudflare:workers" ;
await applyD1Migrations (env.DB , env.TEST_MIGRATIONS );
declare namespace Cloudflare {
interface Env {
TEST_MIGRATIONS : import ("cloudflare:test" ).D1Migration [];
}
}
cloudflare:workers の exports.default.fetch() で、Worker に HTTP リクエストを送るようにテストできます。
import { exports } from "cloudflare:workers" ;
import { describe, expect, it } from "vitest" ;
const BASE = "https://example.com" ;
const json = (body : unknown method : "POST" ,
headers : { "content-type" : "application/json" },
body : JSON .stringify (body),
});
describe ("Todo API" , () => {
it ("POST /todos で作成し、GET /todos/:id で取得できる" , async () => {
const created = await exports .default .fetch (`${BASE} /todos` , json ({ title : "牛乳を買う" }));
expect (created.status ).toBe (201 );
const todo = await created.json <{ id : number ; title : string ; done : number }>();
expect (todo).toMatchObject ({ title : "牛乳を買う" , done : 0 });
const res = await exports .default .fetch (`${BASE} /todos/${todo.id} ` );
expect (res.status ).toBe (200 );
expect (await res.json ()).toMatchObject ({ id : todo.id , title : "牛乳を買う" });
});
it ("title が無いと 400 を返す" , async () => {
const res = await exports .default .fetch (`${BASE} /todos` , json ({}));
expect (res.status ).toBe (400 );
});
it ("PATCH で done を更新し、DELETE で消せる" , async () => {
const todo = await (
await exports .default .fetch (`${BASE} /todos` , json ({ title : "洗濯" }))
).json <{ id : number }>();
const patched = await exports .default .fetch (`${BASE} /todos/${todo.id} ` , {
method : "PATCH" ,
headers : { "content-type" : "application/json" },
body : JSON .stringify ({ done : true }),
});
expect (await patched.json ()).toMatchObject ({ done : 1 });
const del = await exports .default .fetch (`${BASE} /todos/${todo.id} ` , { method : "DELETE" });
expect (del.status ).toBe (204 );
const gone = await exports .default .fetch (`${BASE} /todos/${todo.id} ` );
expect (gone.status ).toBe (404 );
});
});
最初、「テストごとに D1 が空になる」と考えて it を 1 つ足したところ、前の it で作った行が見えて失敗しました。分離の単位はテストファイル です。公式サンプルの setup ファイルにも「setup はテストファイルごとのストレージの分離の外で動く」とあり、同じファイルの中では前のテストのデータが残ります8
そこで、分離を確かめるテストは別ファイルにしました。
import { exports } from "cloudflare:workers" ;
import { expect, it } from "vitest" ;
it ("別のテストファイルの行は見えない" , async () => {
const res = await exports .default .fetch ("https://example.com/todos" );
expect (await res.json ()).toEqual ([]);
});
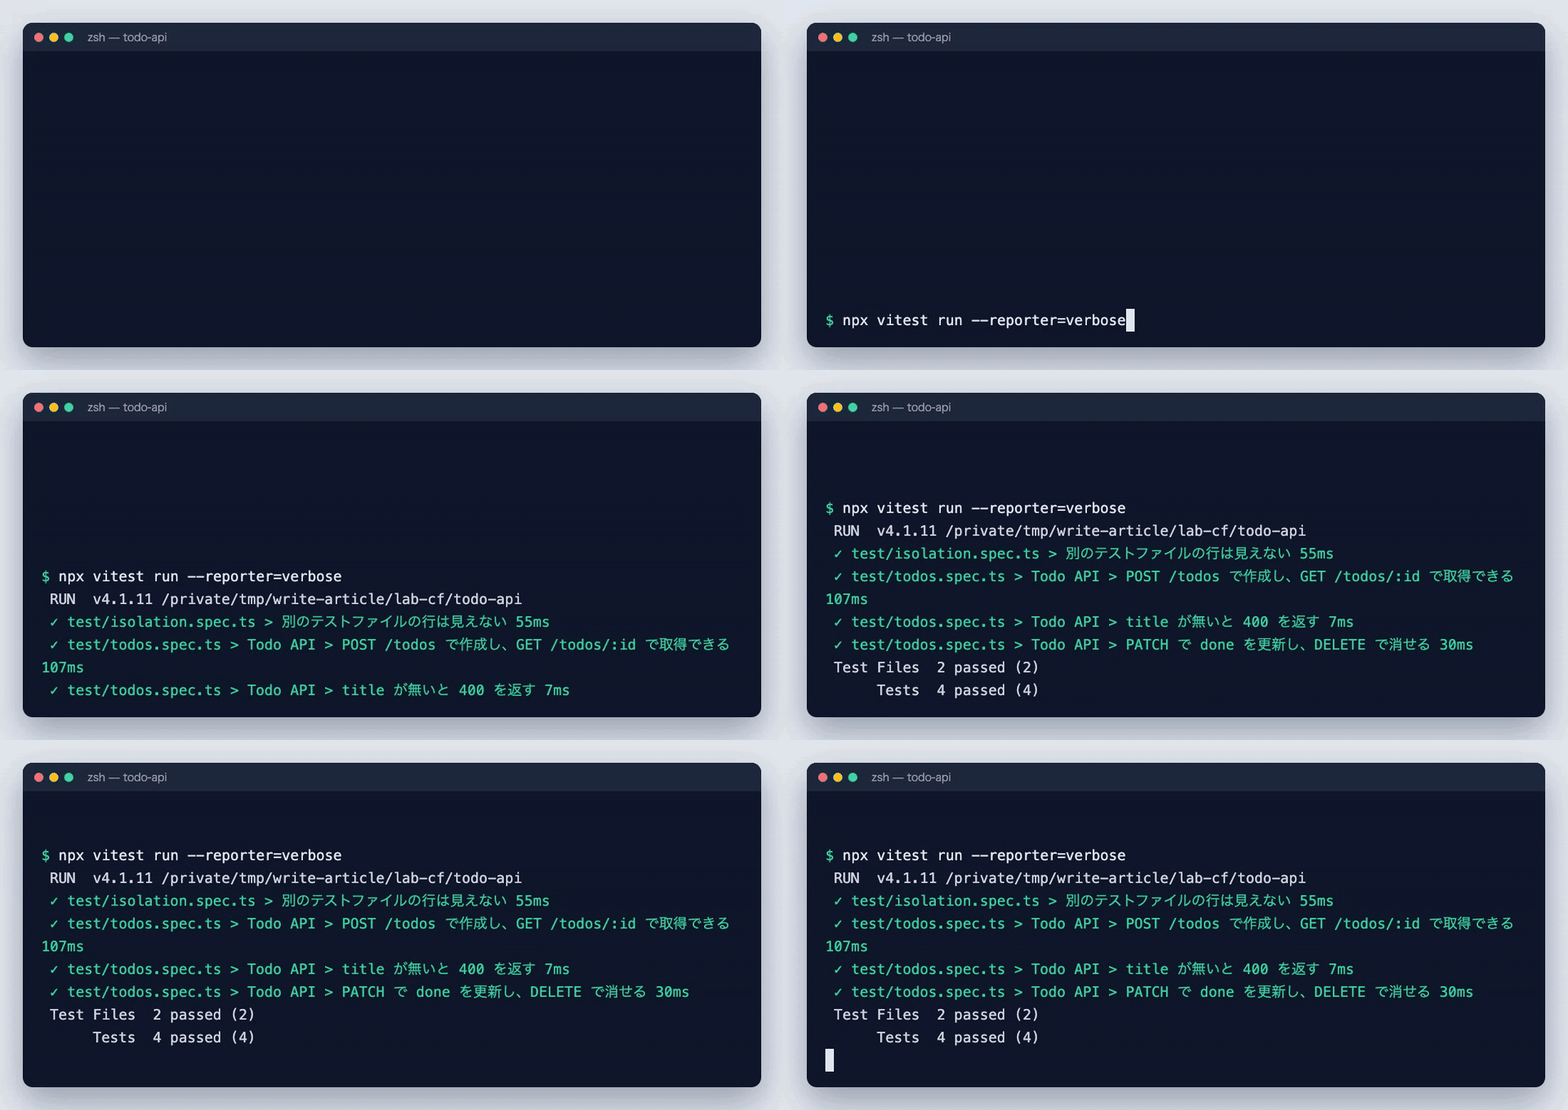
npx vitest run --reporter=verbose で 2 ファイル 4 件のテストがすべて通った出力 筆者が 2026-10-05 に実行した出力(vitest 4.1.11・@cloudflare/vitest-plugin 1.3.6)
同じファイルの中のテストは、「件数が 0 から始まる」ような前提を置かず、自分で作った行の ID だけを見るように書くと安定します。
ここからはアカウントを使う操作なので、人が行います(筆者もこの記事では実行していません)。
npx wrangler login
npx wrangler d1 migrations apply todo-db --remote
npx wrangler deploy
database_id を書いていない場合、自動プロビジョニングが有効なら wrangler deploy の時点でデータベースが作られます4 --no-x-provision で無効にできます。先に wrangler d1 create todo-db で作り、database_id を書く従来の方法でも構いません3 --dry-run でバインディングを確かめられます。
$ npx wrangler deploy --dry-run
Total Upload: 58.95 KiB / gzip: 15.01 KiB
Your Worker has access to the following bindings:
Binding               Resource
env.DB (todo-db)      D1 Database
--dry-run: exiting now.
マイグレーションはデータベース名(todo-db)を指定して流します。Cloudflare のドキュメントも、取り違えを防ぐためにバインディング名ではなくデータベース名を使うよう勧めています5
D1 は使った分だけの課金で、アイドル時間には料金がかかりません。2026 年 10 月時点の料金は次のとおりです9
項目 Workers Free Workers Paid 読み取り行数 1 日 500 万行 月 250 億行込み、超過 100 万行あたり 0.001 ドル 書き込み行数 1 日 10 万行 月 5,000 万行込み、超過 100 万行あたり 1.00 ドル ストレージ 合計 5 GB 5 GB 込み、超過 1 GB・月あたり 0.75 ドル
「読み取り行数」は返した行ではなく、スキャンした行 で数えます9 WHERE に使う列にインデックスを張ると、読み取り行数(=料金)が減ります。
上限にも差があります10
D1 のデータベース 1 個あたりの最大サイズ(GB) データを表で見る D1 のデータベース 1 個あたりの最大サイズ(GB) プラン 最大サイズ(GB)(GB) Workers Free 0.5 Workers Paid 10
出典: Cloudflare D1 Limits(Free は 500 MB、Paid は 10 GB。2026-10-05 参照) 上限 Free Paid アカウントあたりのデータベース数 10 50,000 1 回の Worker 実行あたりのクエリ数 50 1,000 1 クエリのバインド引数 100 100 1 行のサイズ 2 MB 2 MB
D1 のデータベースは 1 つずつ逐次にクエリを処理します(シングルスレッド)10
テスト用の D1 にマイグレーションが流れていません。vitest.config.mts の setupFiles と、TEST_MIGRATIONS のバインディングを確かめます。wrangler d1 migrations apply --local はテストの D1 には効きません。
2026 年 10 月時点の雛形は @cloudflare/ です。Hono のドキュメントには旧名の @cloudflare/ が書かれている箇所もあります2 7
wrangler d1 execute や migrations apply は、--remote を付けると本番に流れます。Claude Code に任せるなら、CLAUDE.md や hooks で --remote の付いたコマンドを禁止しておきます。
c.req.param("id") は文字列です。SQLite は WHERE id = '1' でも数値の 1 と比べてくれますが、ほかの処理で数値として扱うなら Number() で変換し、NaN を 400 にします。
項目が増えたら、Zod などのスキーマで検証するミドルウェア(@hono/ など)を使うと、ルートが短くなり型も付きます。
Hono+D1 なら、マイグレーション 1 本とルート 5 本で CRUD の REST API が作れる
テーブルは wrangler d1 migrations で管理し、ローカルは --local、本番は --remote で流す
値は bind() で渡し、RETURNING * と first() で 1 往復にする
テストは @cloudflare/。マイグレーションは readD1Migrations+applyD1Migrations で流し、ストレージはテストファイルごとに分かれる
Claude Code には「作るもの・確かめ方・やらないこと」をまとめて伝え、本番への適用とデプロイは人が行う
画像などのファイルを扱うなら、次は Cloudflare R2 の署名付き URL で画像を直接アップロード へ。AWS と比べて選びたい場合は Cloudflare Workers と AWS Lambda の比較 も参考になります。
試せます。wrangler dev --local、wrangler d1 migrations apply --local、Vitest はすべて手元で動き、ログインは要りません。この記事の curl とテストの出力も、ログインしていない状態で取ったものです。
ローカルの開発とテストだけなら、binding と database_name だけで動きました。デプロイでは、Wrangler 4.45.0 以降の自動プロビジョニング(open beta)がデータベースを作り、ID を書き戻します4 wrangler d1 create で作って ID を書いても構いません3
新しく始めるなら @cloudflare/ です。@cloudflare/ を置き換えたもので、API と設定は同じです。Vitest 4.1 以降が必要です7
app.request() は手軽ですが、D1 などのバインディングは自分で用意する必要があります。@cloudflare/ は workerd の中で動き、wrangler.jsonc のバインディング(D1 を含む)をそのまま使えるので、本番に近い形でテストできます。
2026 年 10 月時点の Workers Free では、1 日あたり読み取り 500 万行・書き込み 10 万行、ストレージは合計 5 GB です。データベース 1 個の上限は 500 MB です9 10